 NovyDeco


01
Dive settings
Everything that drives the computation: gradient factors, conservatism VPM, bottom / deco / surface ppO₂, consumption rates, speeds, last-stop depth, altitude, water type...
The app's home screen, then the planner icon by icon, your first dive in three steps, the logbook and the tools. Tap or hover the areas of the screenshots to read what they do.
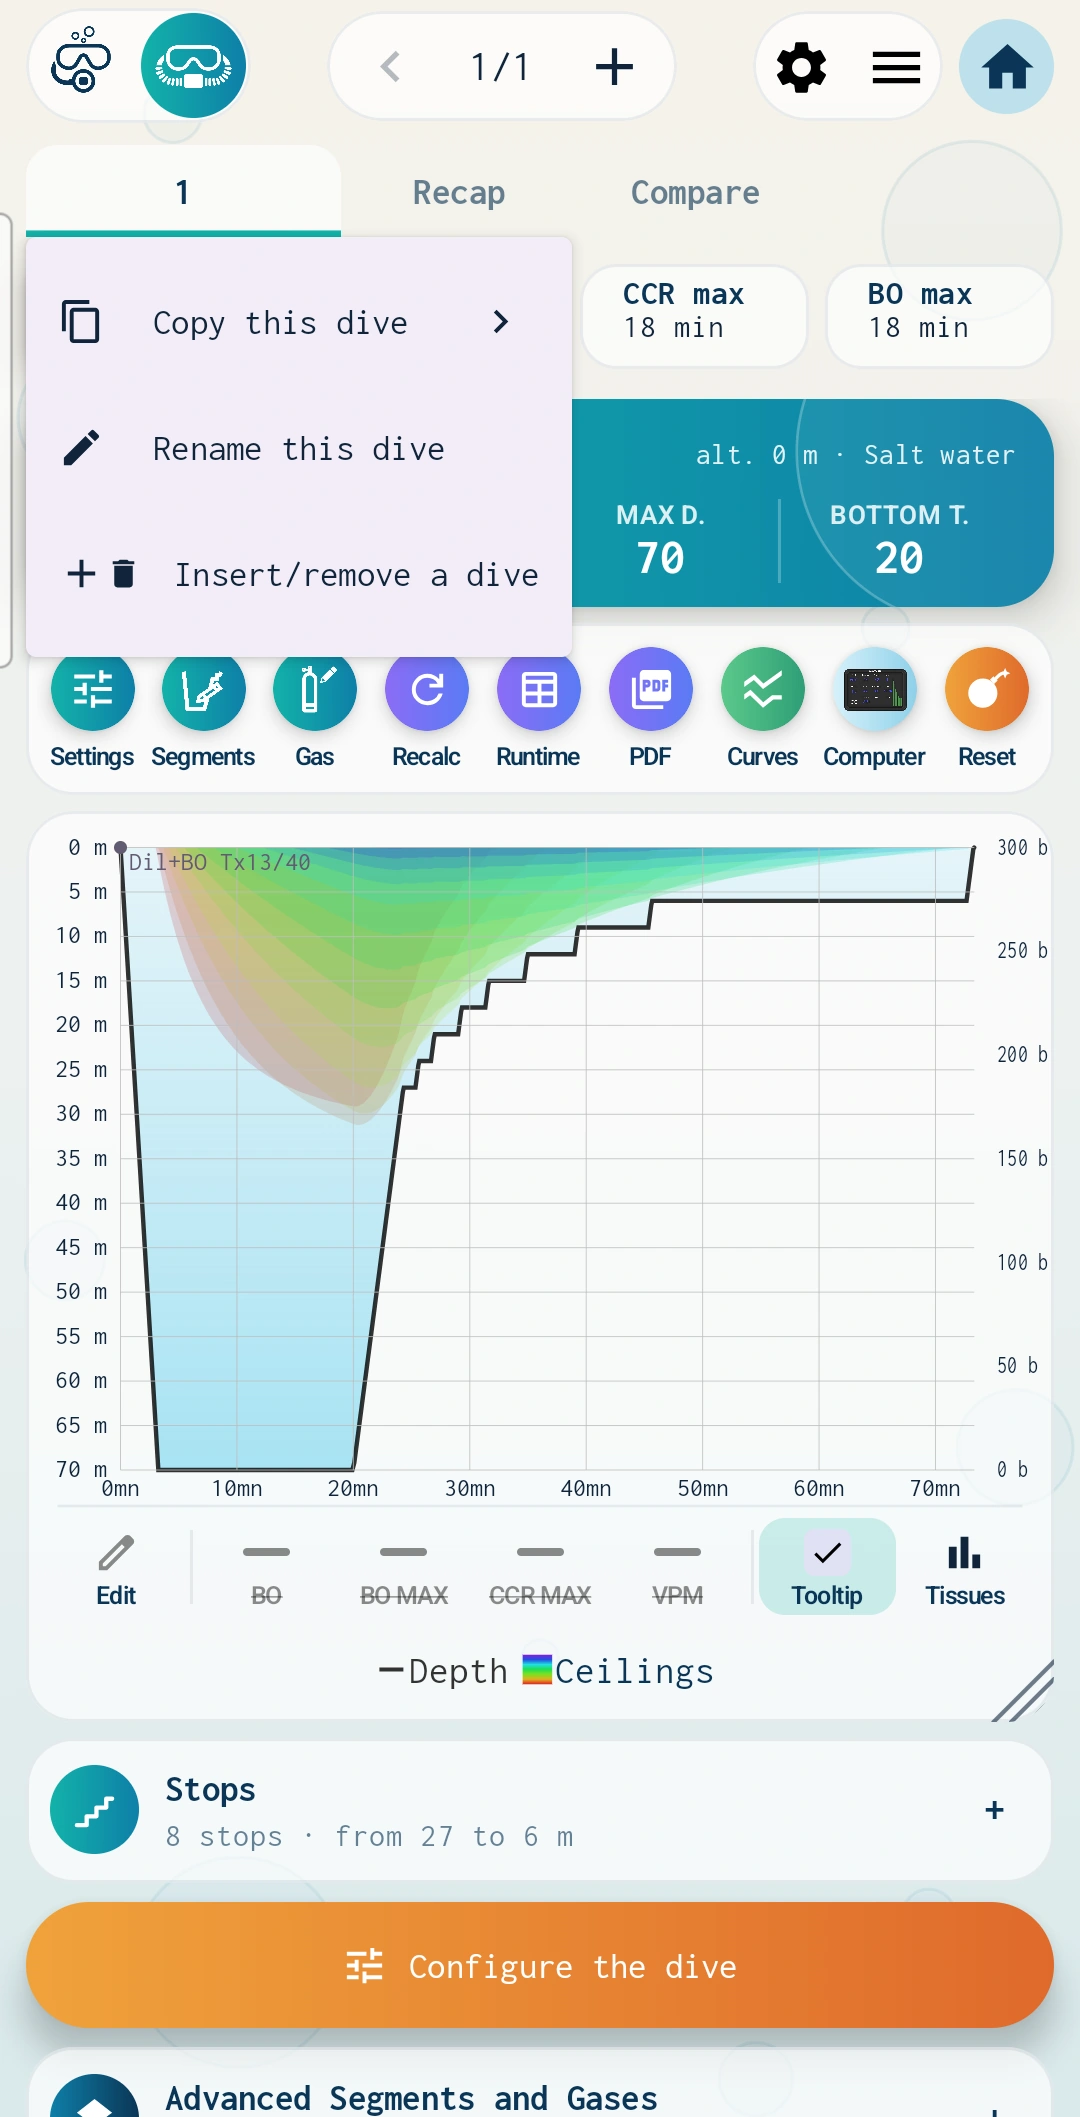
A rebreather plan at 70 m for 20 min, with the tooltip open. Every numbered area is clickable; the full list follows the screenshot.
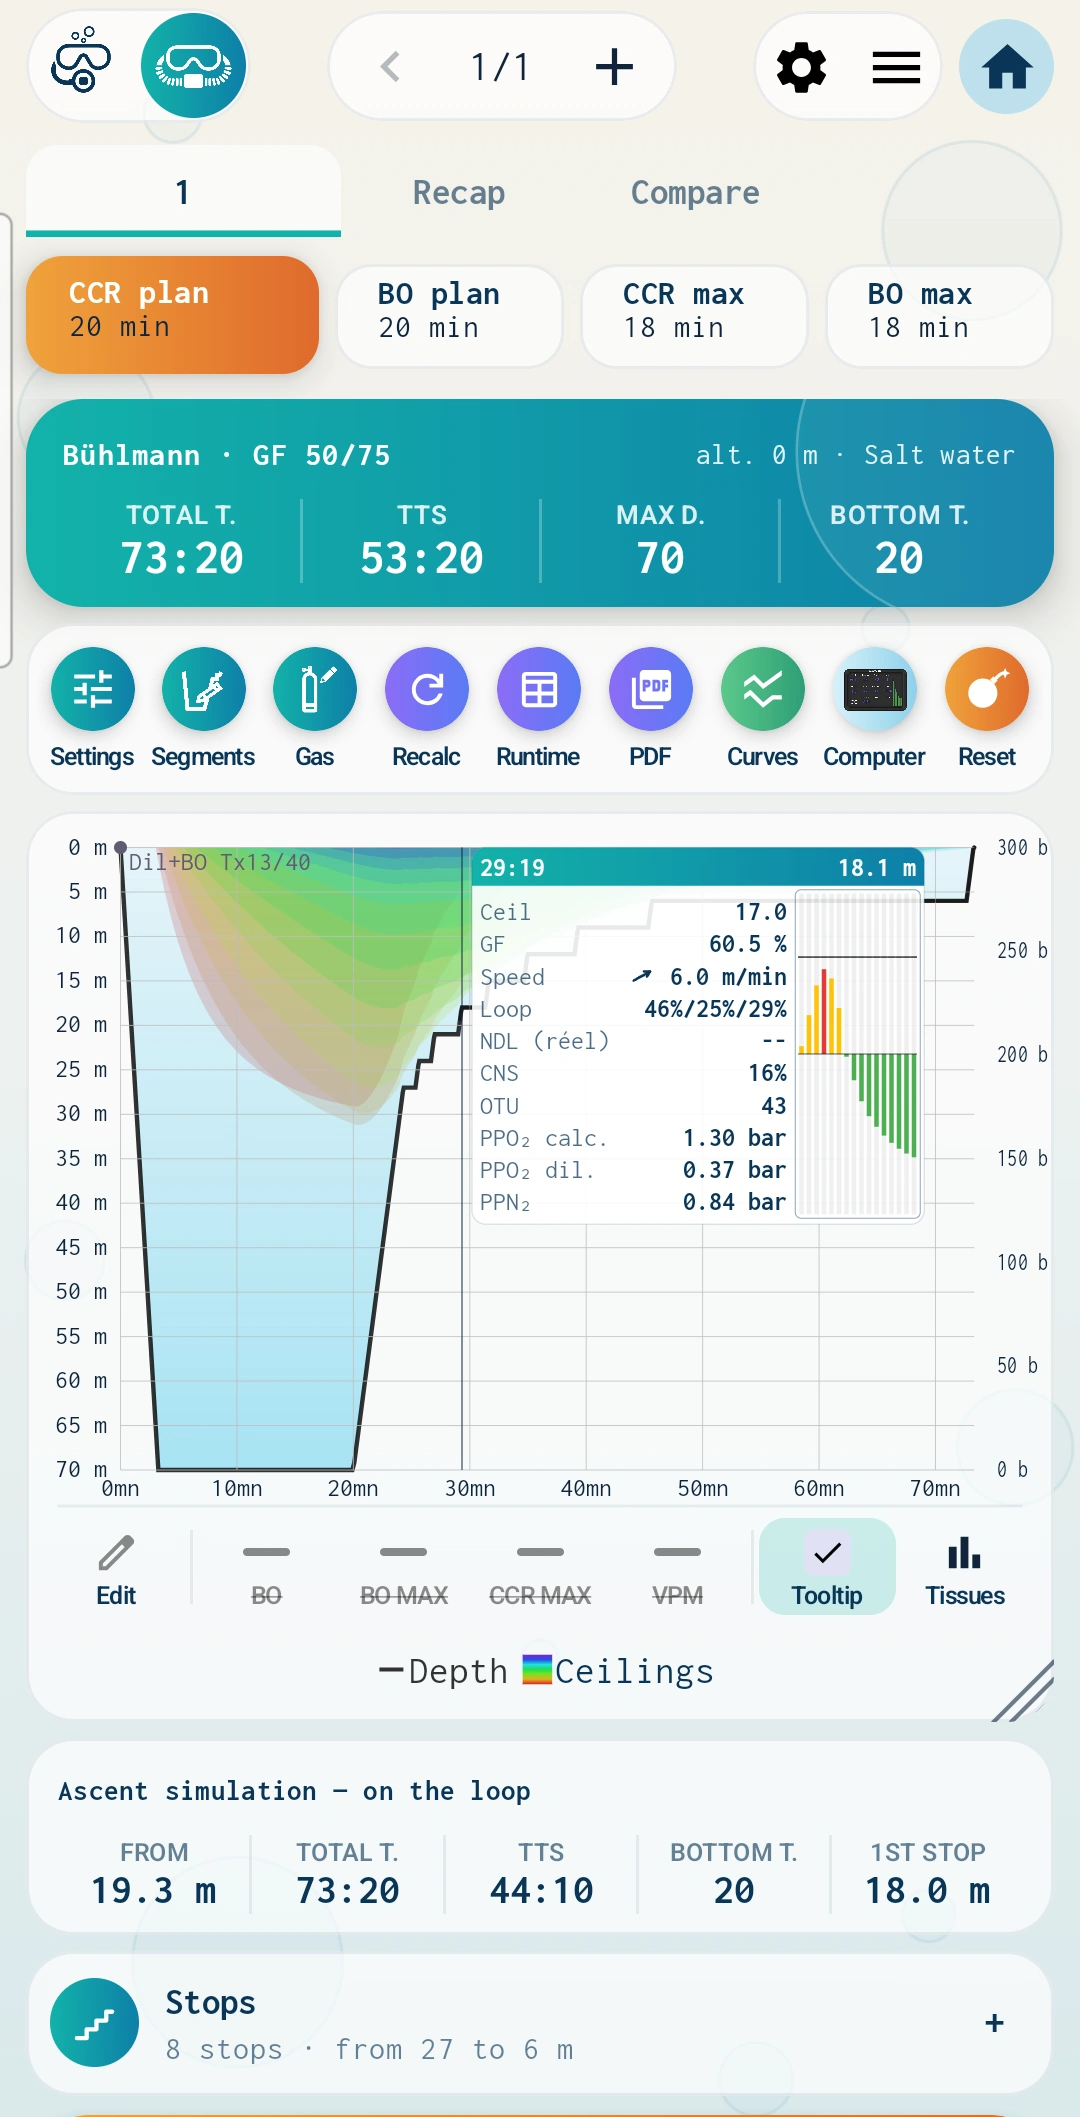
Nine actions on the dive, each named under its icon: what you set, what you compute and consult, the computer, and at the very end the reset.

Everything that drives the computation: gradient factors, conservatism VPM, bottom / deco / surface ppO₂, consumption rates, speeds, last-stop depth, altitude, water type...

The profile step by step: depth and duration of each segment, intermediate descents and ascents, multi-level profiles.

Mix (O₂ / He), cylinder volume and pressure, diluent or bail-out usage. With several gases, a list asks which one to edit, or adds one.

Runs the computation of this dive again after a change of setting, segment or gas. Usefull if automatic recompute fails.

The plan as a table: depth, duration, run time, gas, ppO₂, END, CNS and OTU for every line.

Generates a PDF of the dive (profile, runtime, gases) to print or share.

Expands the curve selector: per-compartment ceilings, Bühlmann or VPM profile and ceilings, M-values, gases.
Starts the simulator: the plan is replayed minute by minute like on a computer screen (depth, stop, TTS, ppO₂, tissues).

Clears the whole planning (dives, segments, gases, computation settings) after confirmation.
Under the chart, seven toggles set what is drawn: editing, overlaid plans, the tooltip and its bar chart. When on, a toggle is highlighted; when off, its name is struck through.


Enables touch editing of the profile: move the key points of the line; the + and − buttons add or remove a point.
Draws the bail-out plan over the displayed CCR plan: you see where the open-circuit ascent goes compared with the loop. One click overlays the BO plan; a second click makes it the primary view (showing the tooltip and dive summary for the BO plan).
Overlays the BO max plan: how much the bottom time would have to be shortened for the bail-out gases to be enough. One click overlays the BO max plan; a second click makes it the primary view (showing the tooltip and dive summary for the BO max plan).
Overlays the CCR max plan: the longest possible dive on the loop within your limits. One click overlays the CCR max plan; a second click makes it the primary view (showing the tooltip and dive summary for the CCR max plan).
Shows VPM-B over Bühlmann (or the reverse, depending on the leading model). The small V / B buttons pick which one drives the tooltip and the summary card. A greyed button means the companion plan is not computed or the combination is excluded.
Enables or disables the tooltip that follows your finger on the line.

Picks the bar graph drawn inside the tooltip: tissues, tissues / ambient pressure, or none.
Three steps are enough for a first complete plan. The example is on a rebreather; on open circuit the dialog is the same without the setpoint.
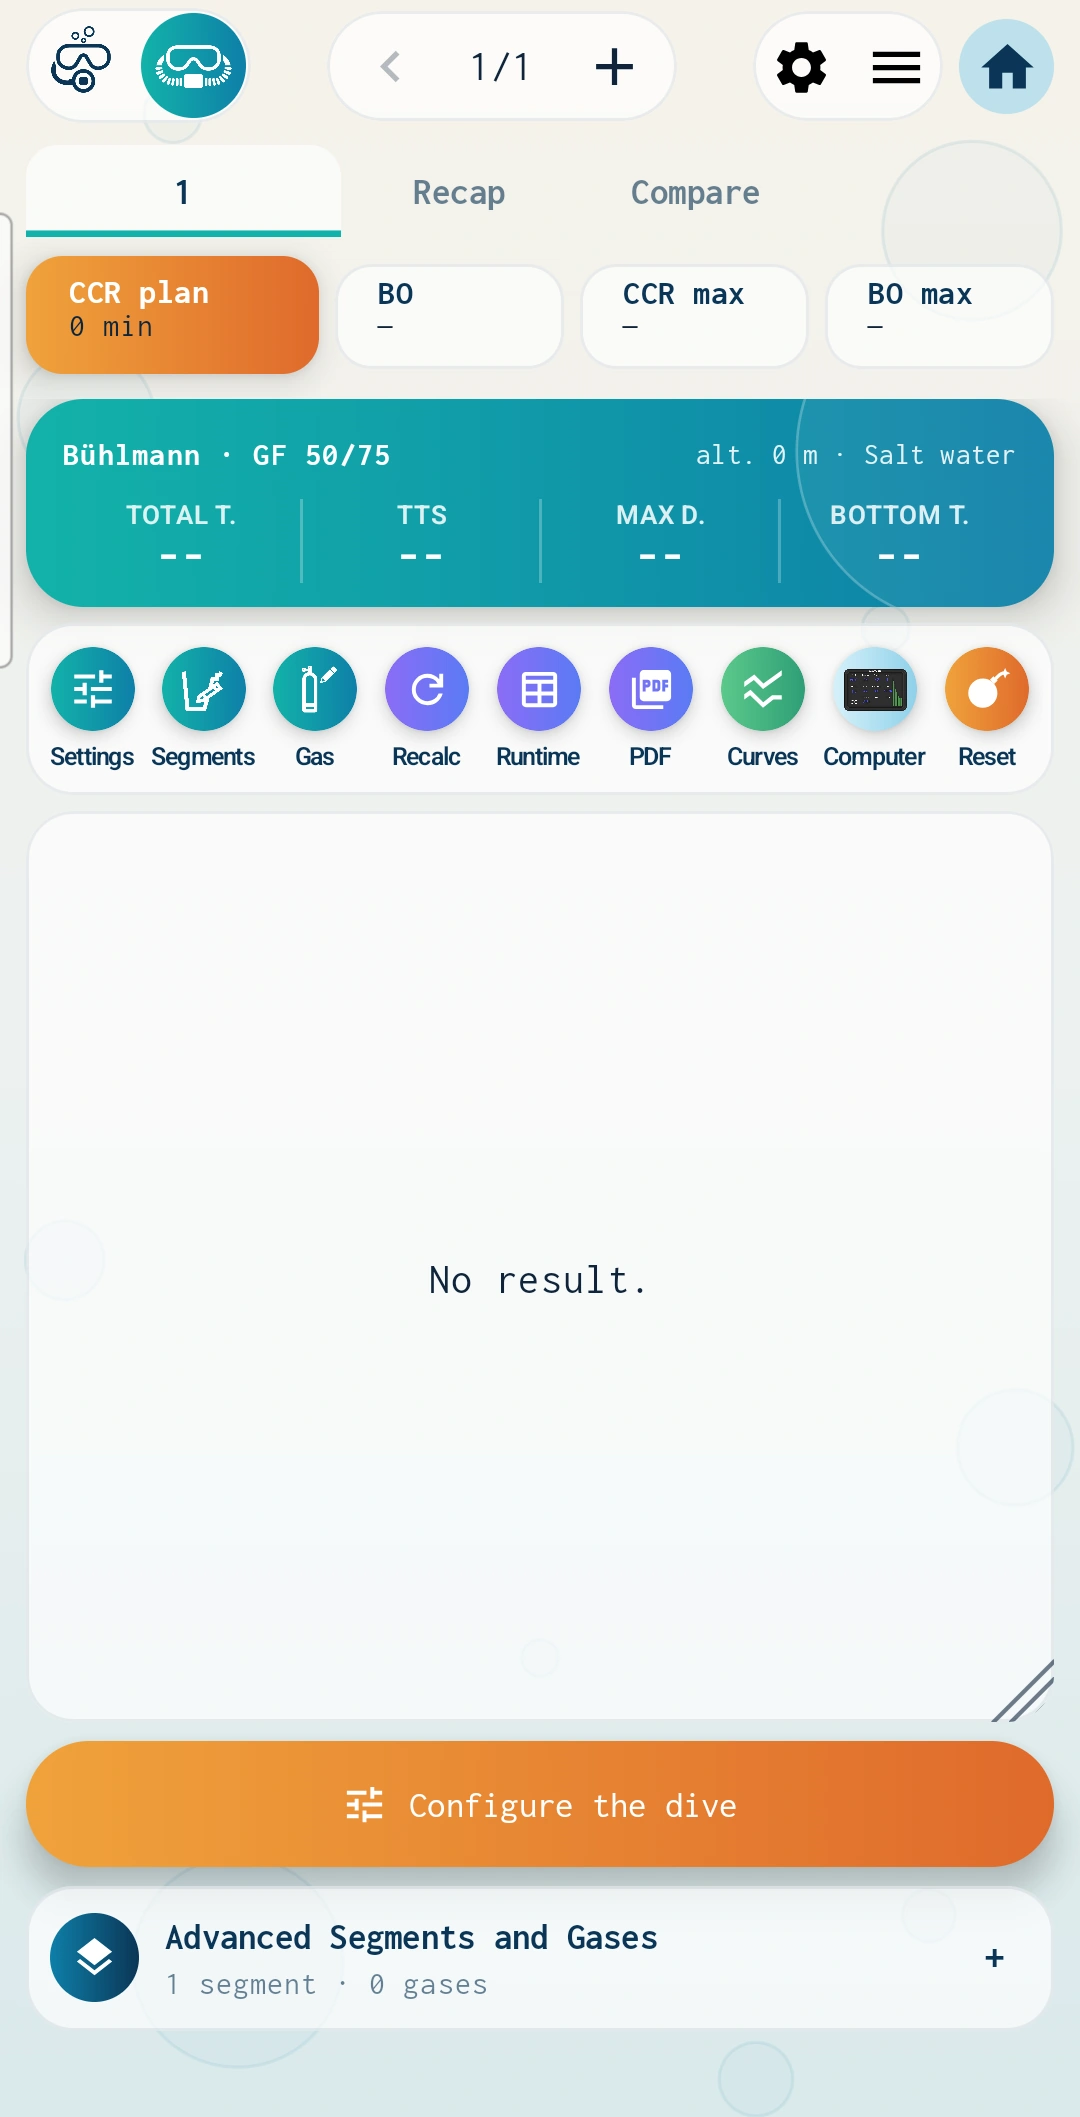
Select the cylinder (open circuit) or the mask (rebreather) at the top left. While no plan exists, the screen shows “No result”. Tap the orange Configure the dive button.
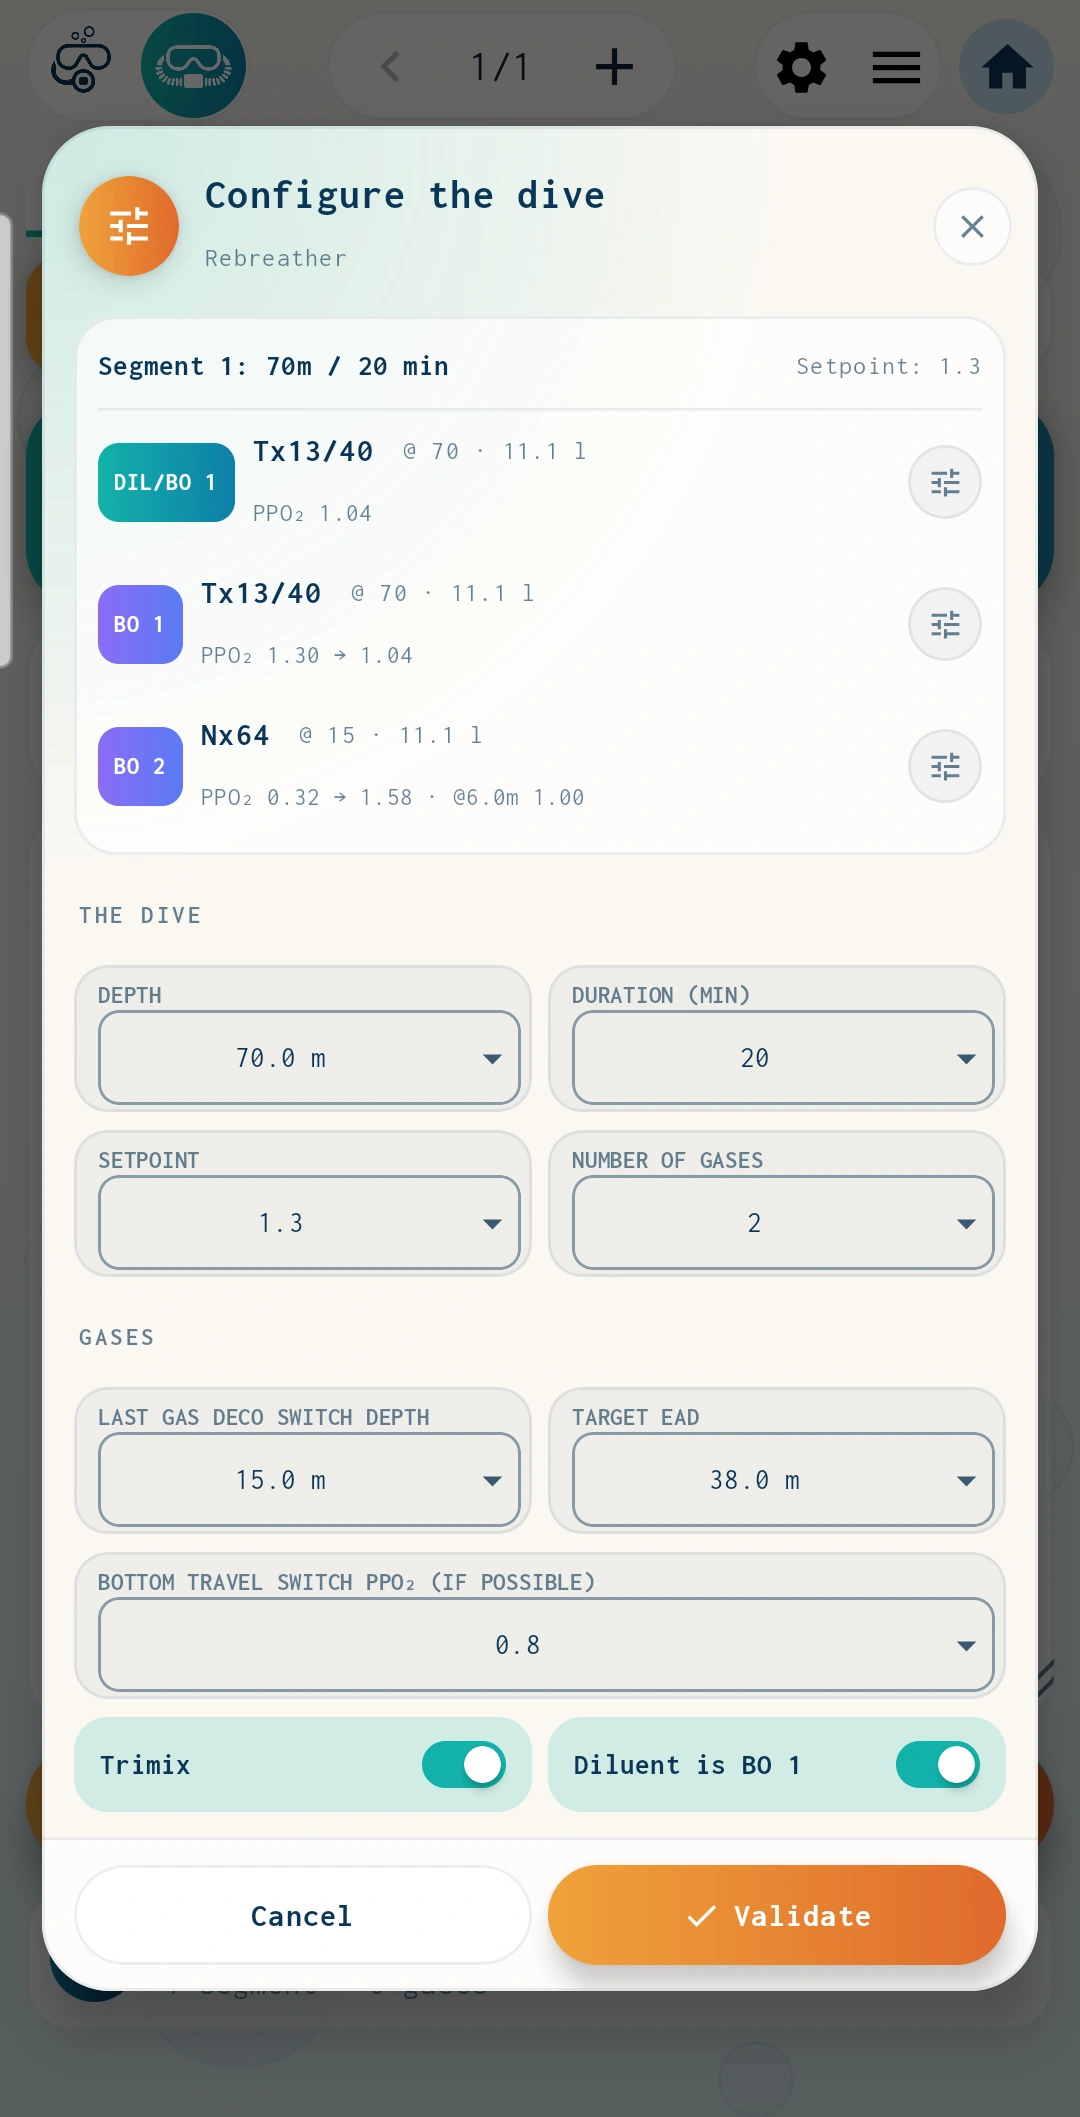
Depth and duration of the bottom segment, loop setpoint, number of gases, last gas-switch depth, bottom-to-travel switch ppO₂ and target END. The top frame summarises the proposed mixes (diluent and bail-outs) with their ppO₂ at the switch depths. The settings button at the end of each line opens the gas to adjust it; the Trimix and “The diluent is the 1st BO” switches complete the choice. Validate starts the computation.
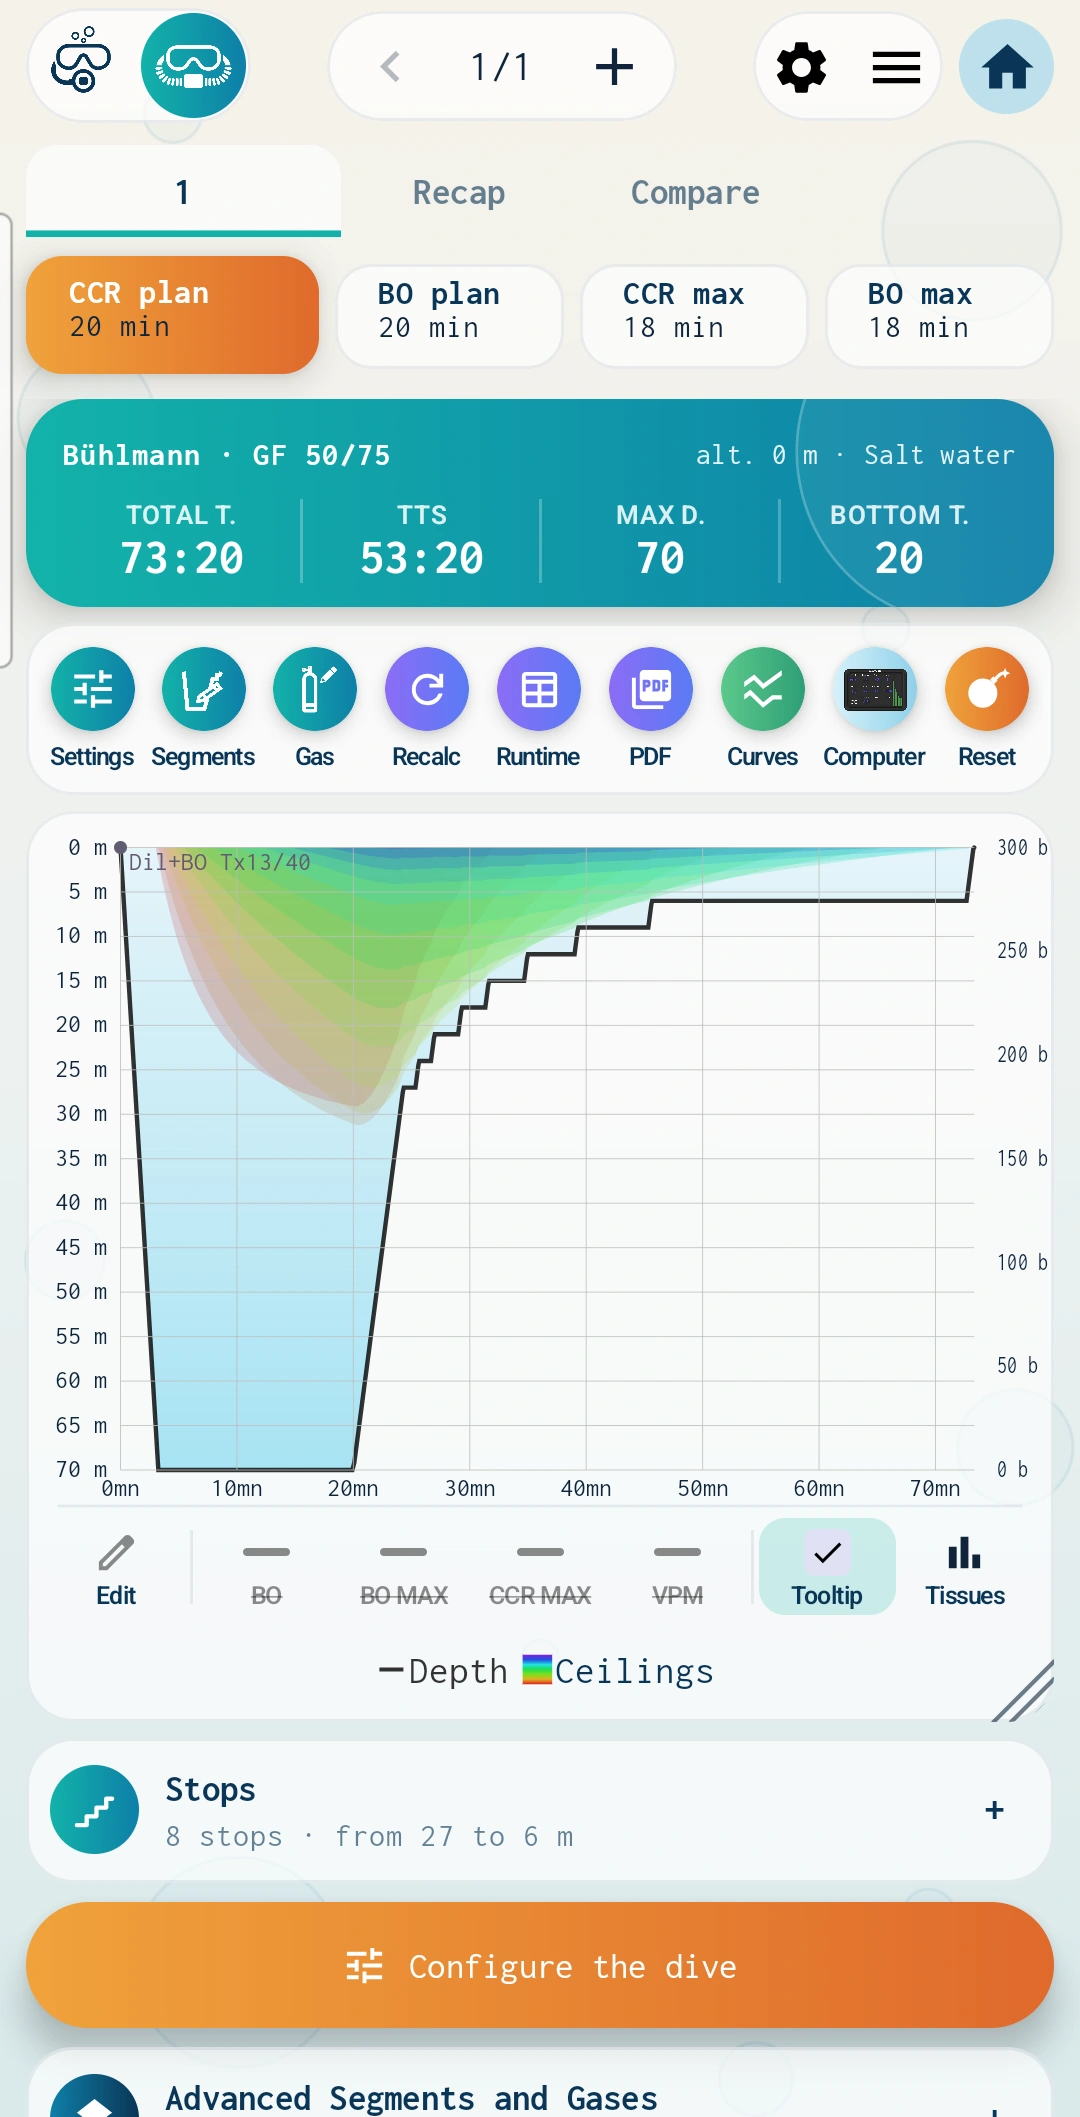
The profile appears with the staircase of stops and the coloured ceilings. The chips give the CCR plan, the bail-out plan and the “max” variants; the card gives the model and its GF, then total time, TTS, maximum depth and bottom time. Expand Stops for the list, or Advanced segments and gases to refine segment by segment.
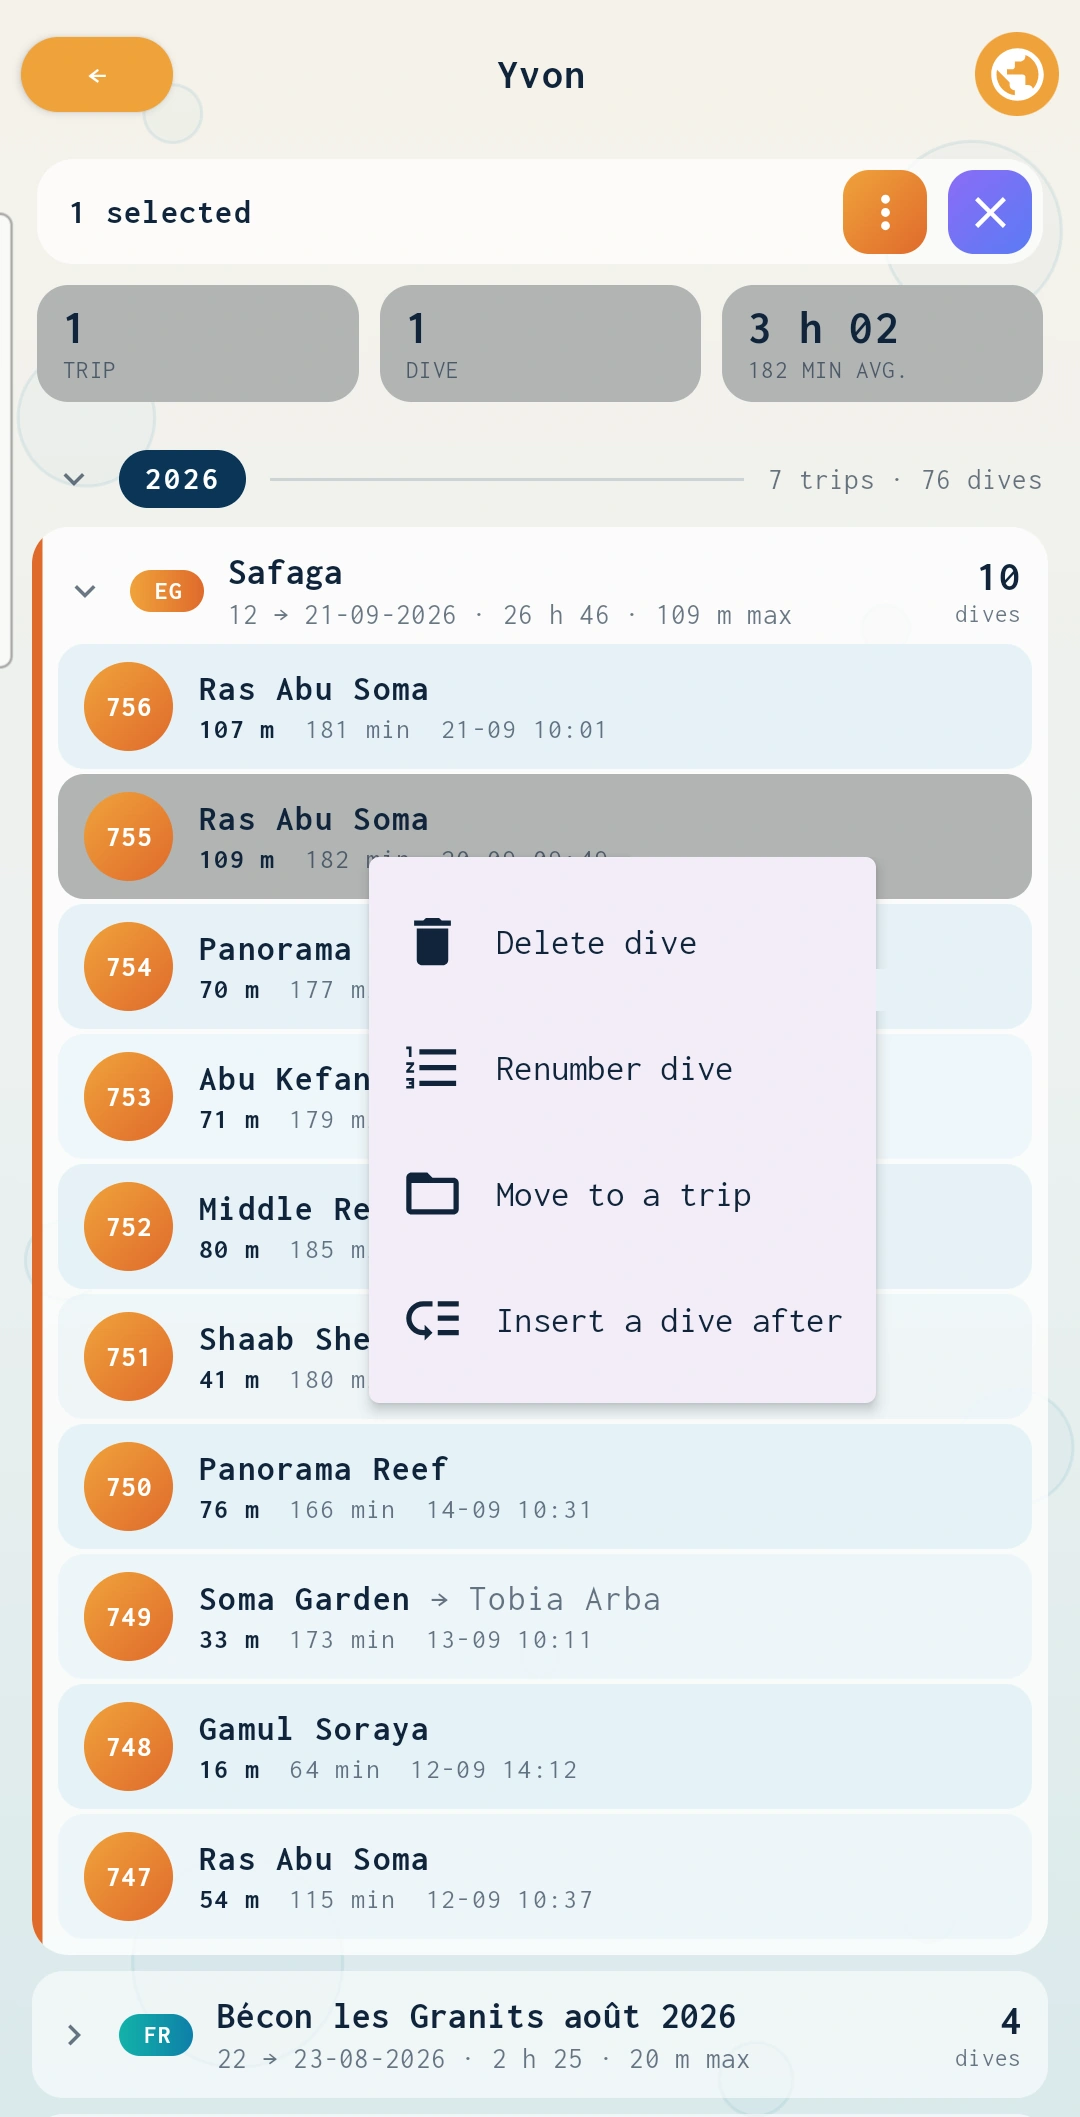
Your dives, sorted by year and trip, with their full profile. A few features are worth a look.
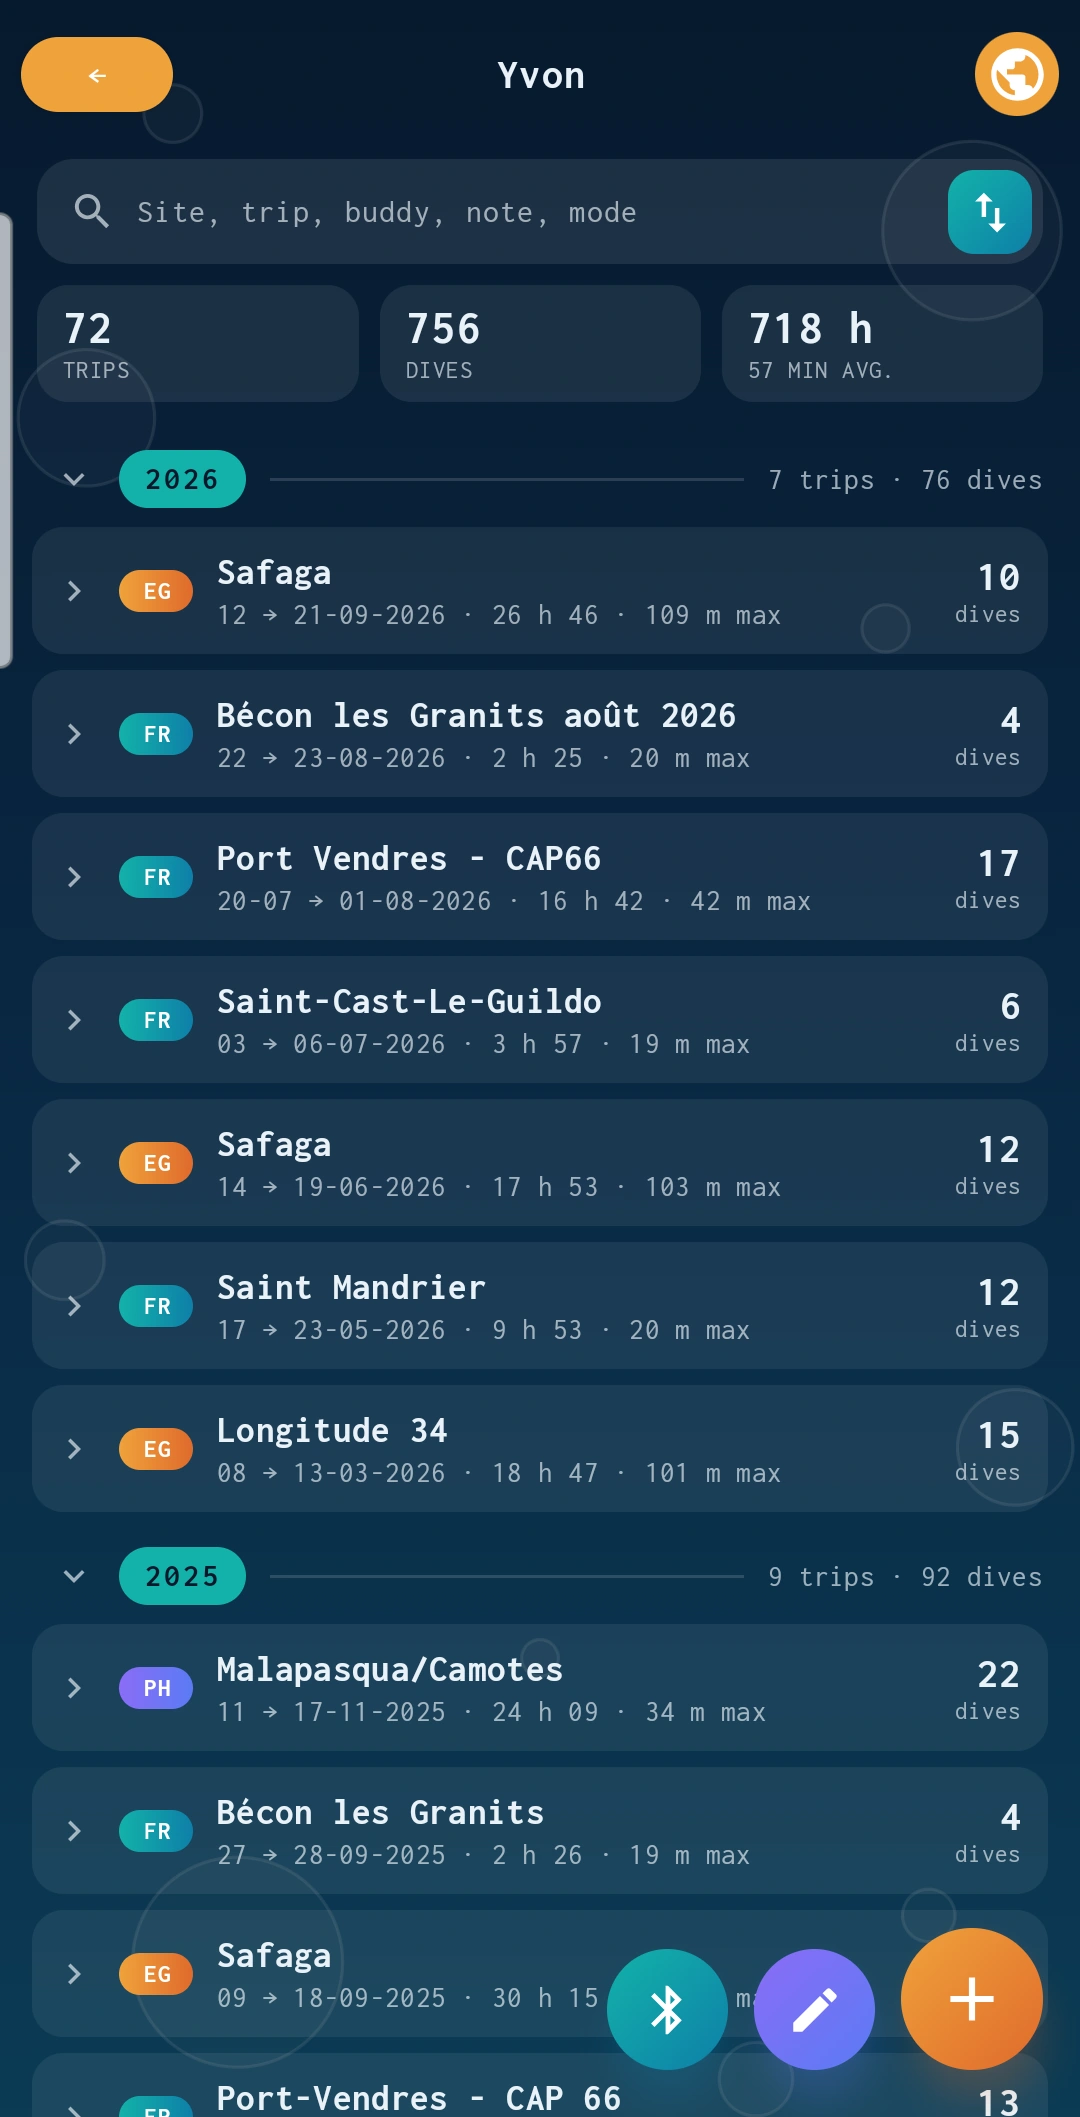
Each trip folds down to its dates, duration and maximum depth; search covers sites, buddies, notes and mode.
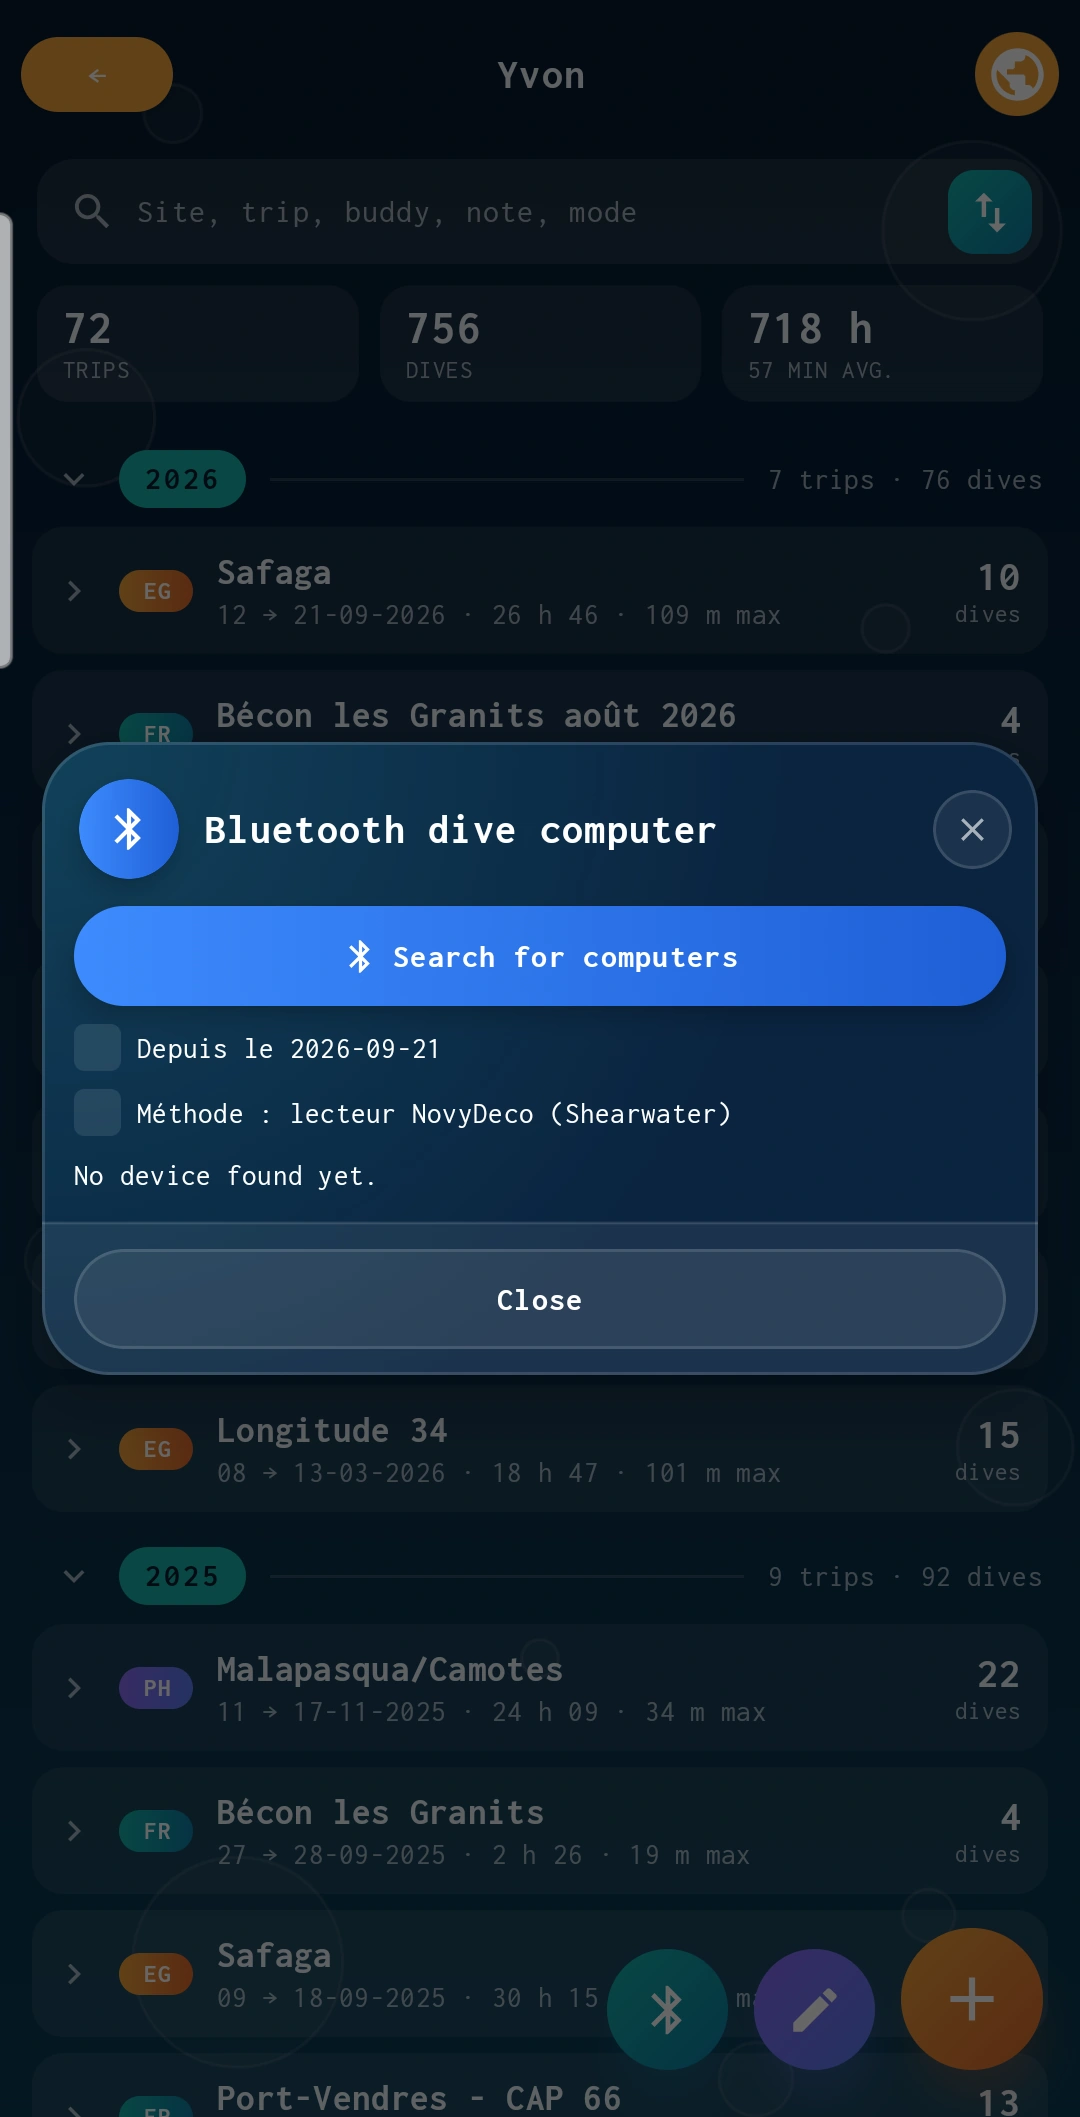
Shearwater computers (Perdix, Petrel, Teric…) are read directly, and many other computers through libdivecomputer. You can fetch only the recent dives.
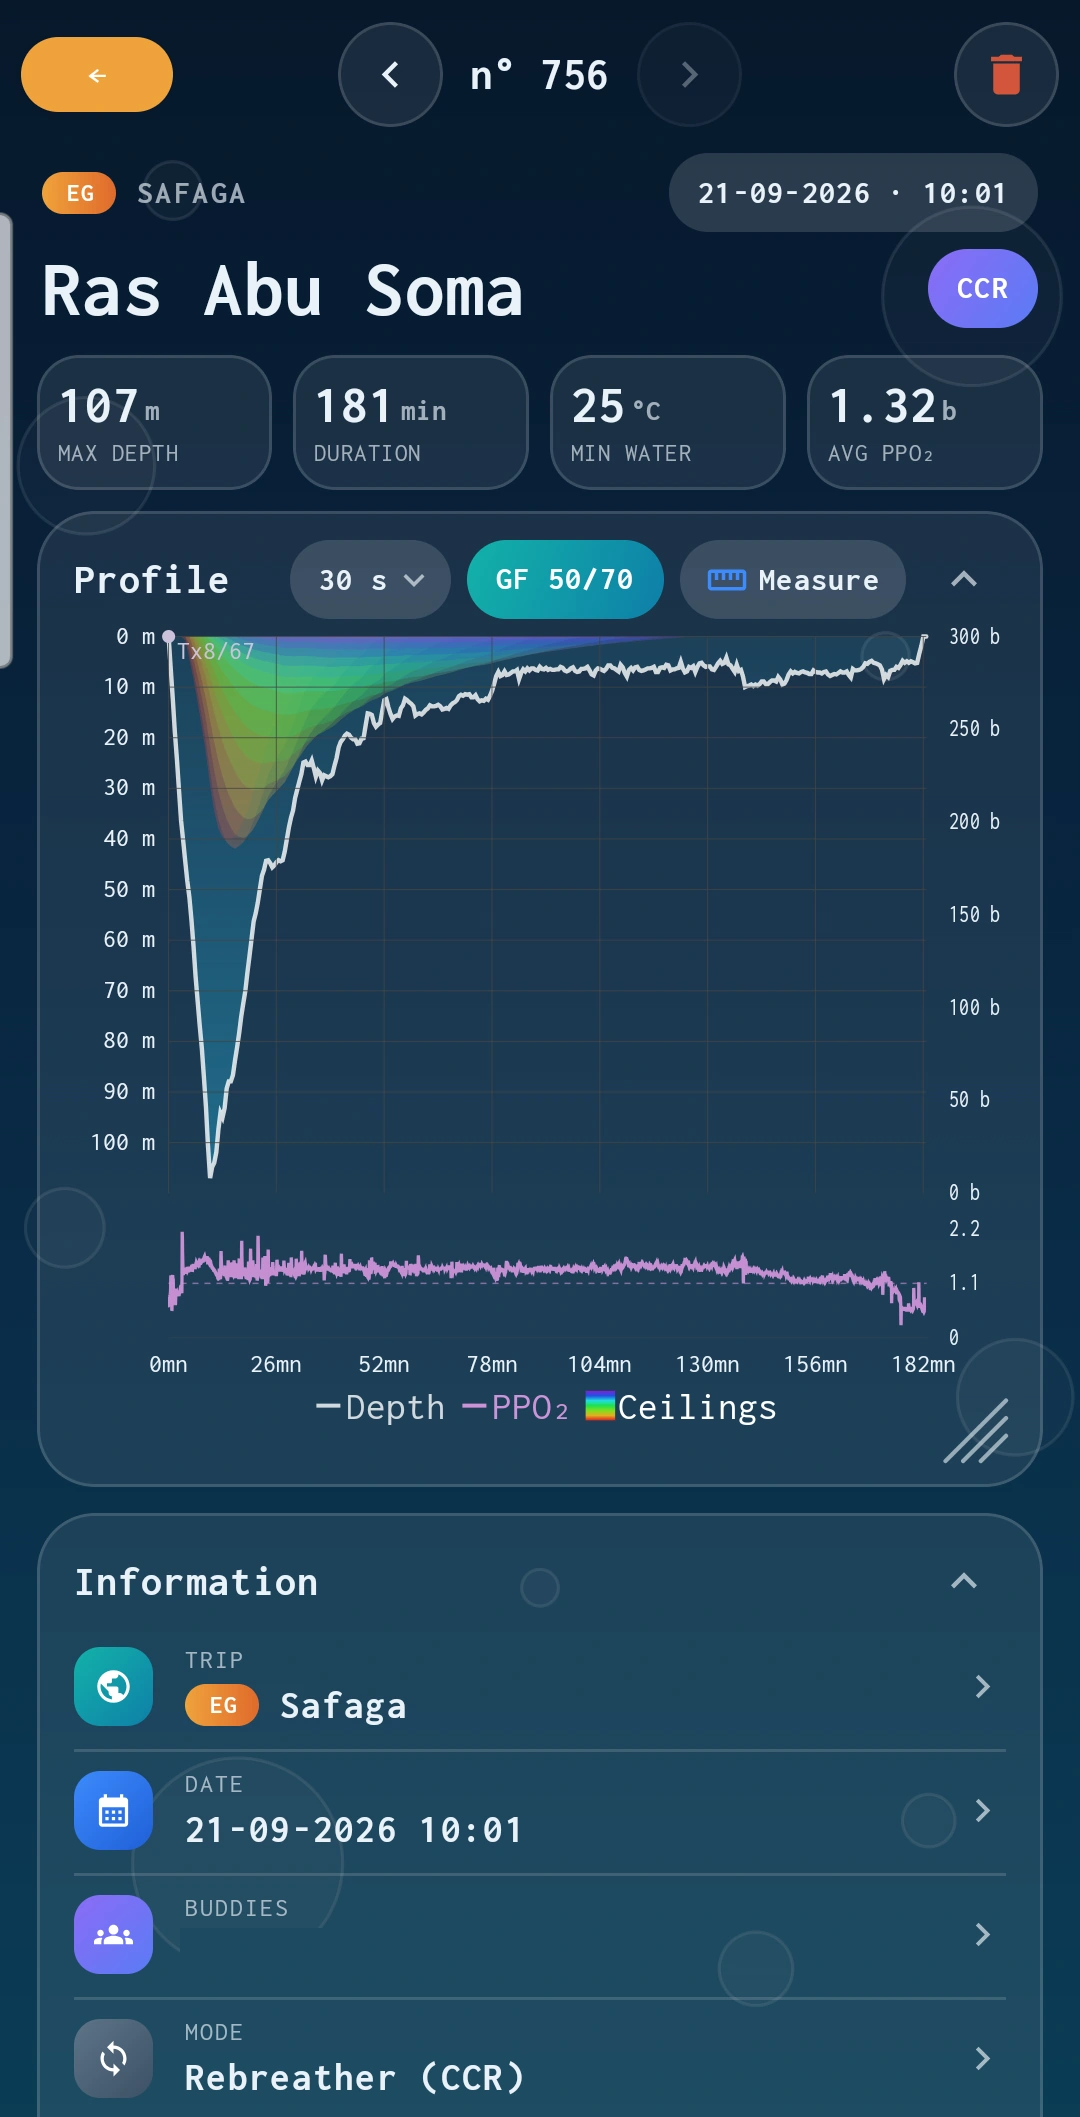
Profile, ceilings recomputed at the GF of your choice, loop ppO₂, temperature, toxicity. “Measure” brackets part of the profile to read its duration and speed.
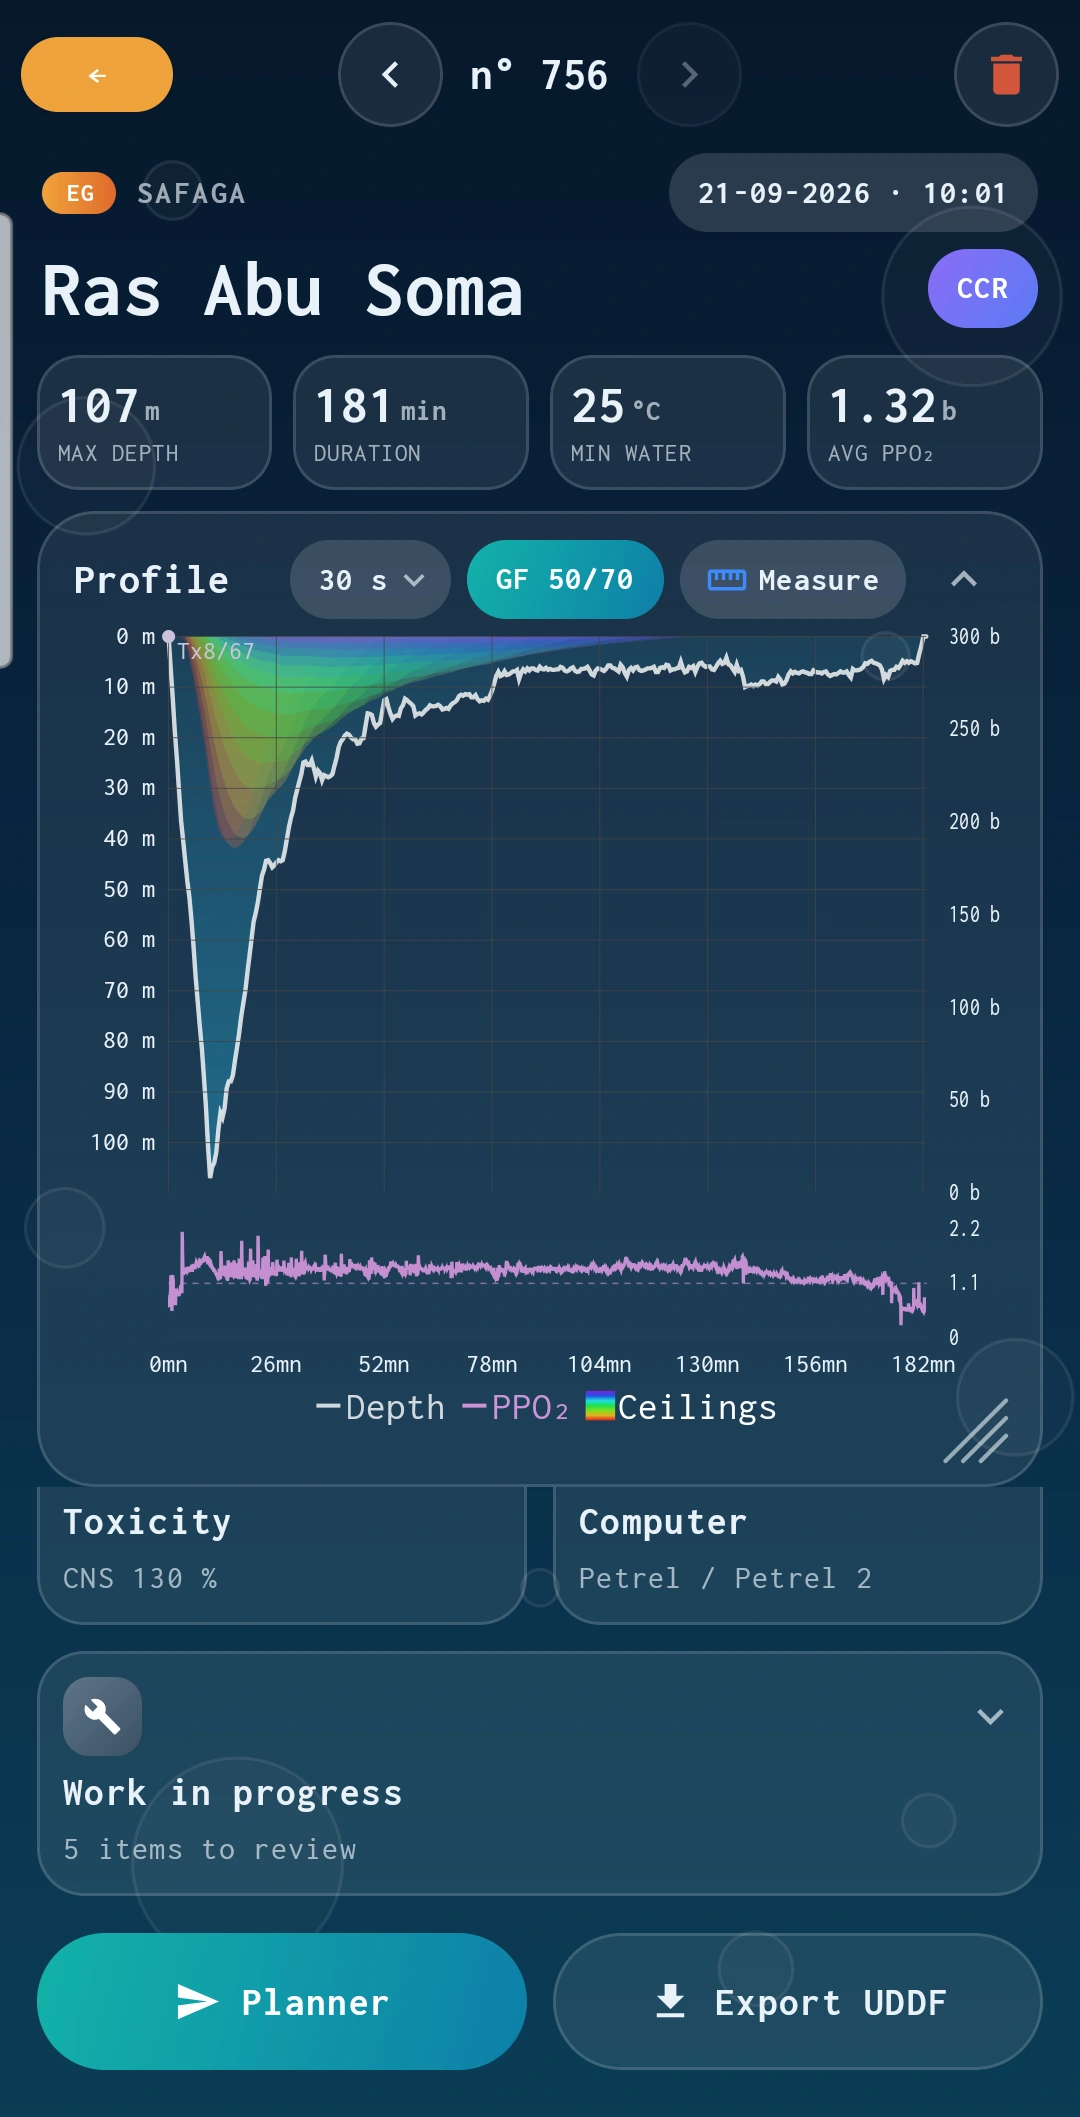
The Planner button, at the bottom of the record, takes a real dive as the starting point of a new plan.
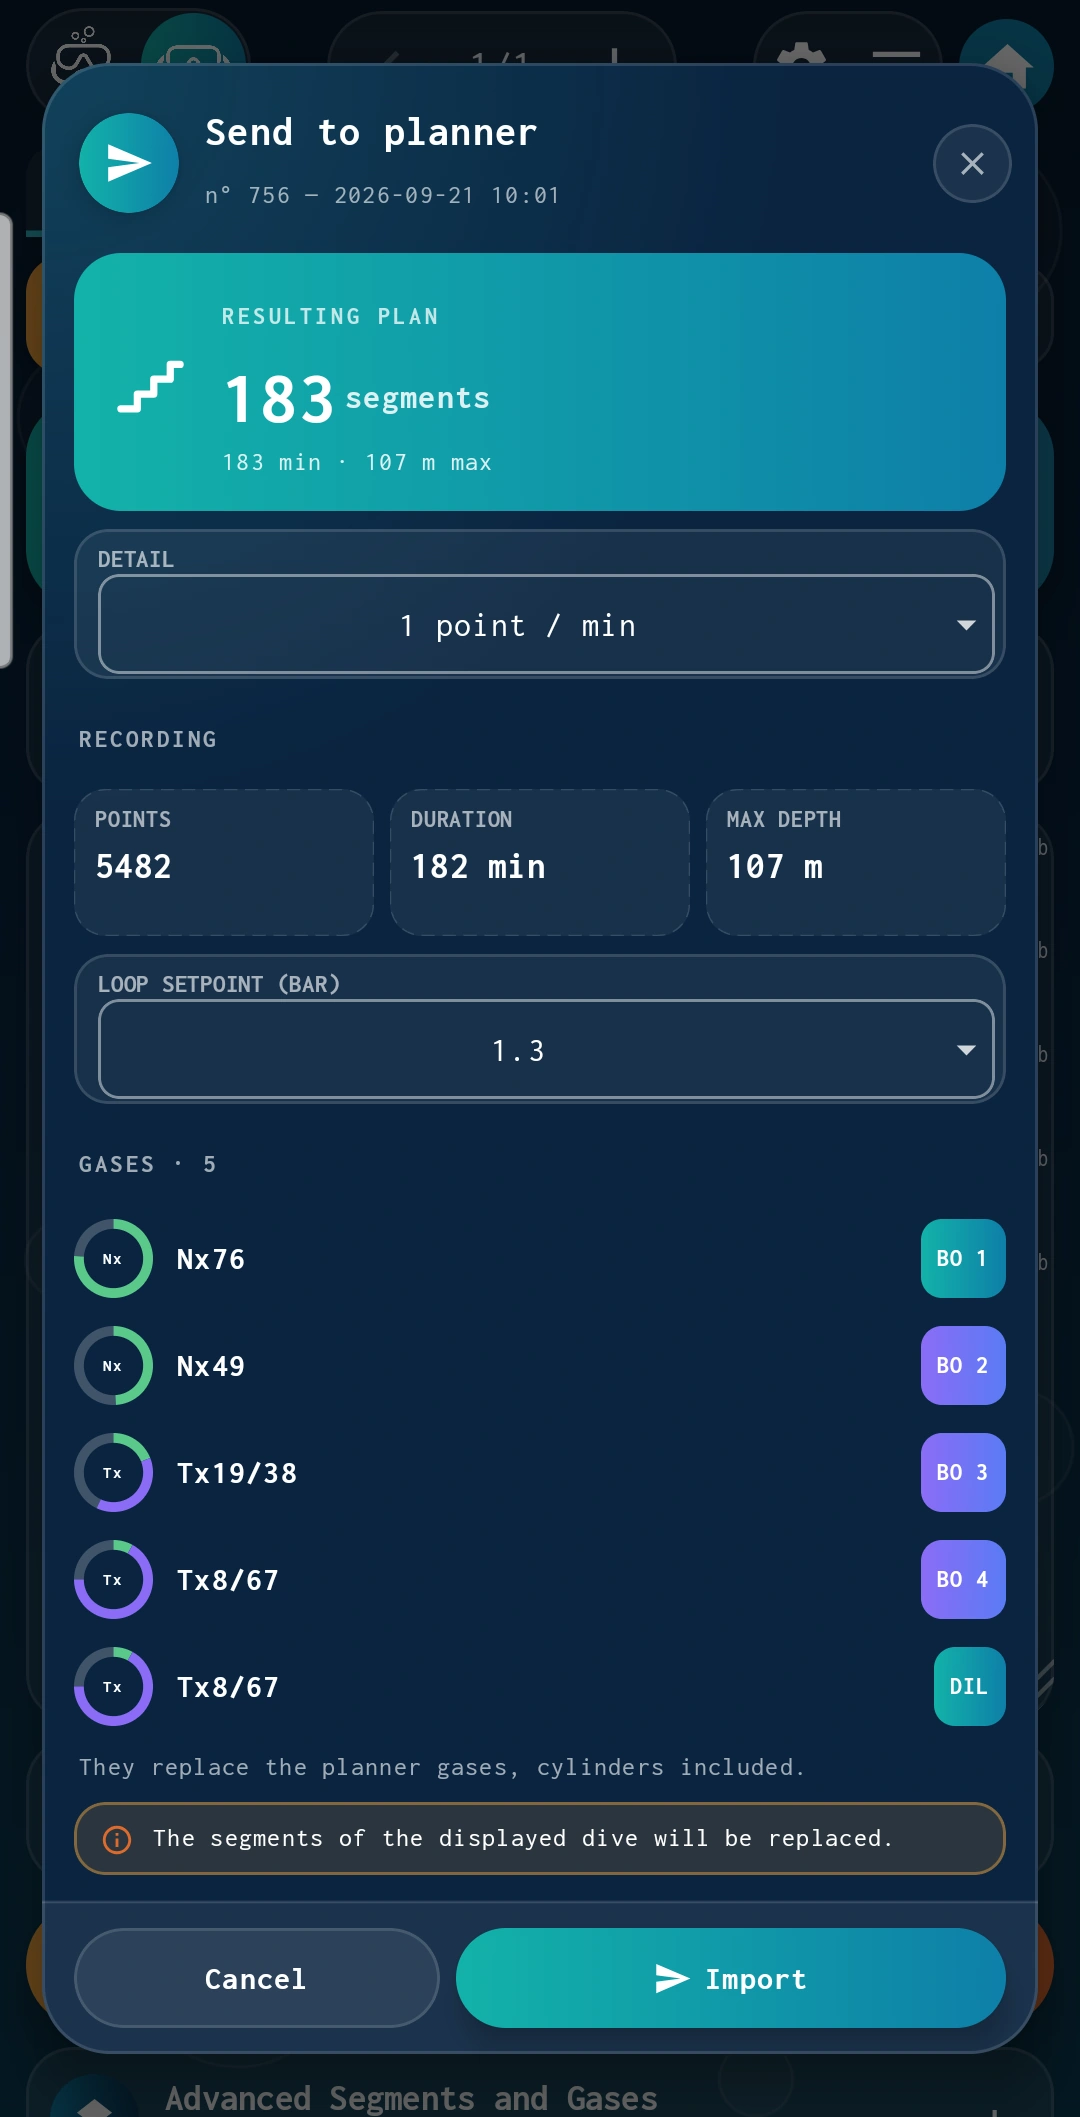
Pick the detail and the setpoint: the dive's segments and gases replace the planner's, ready to be edited.
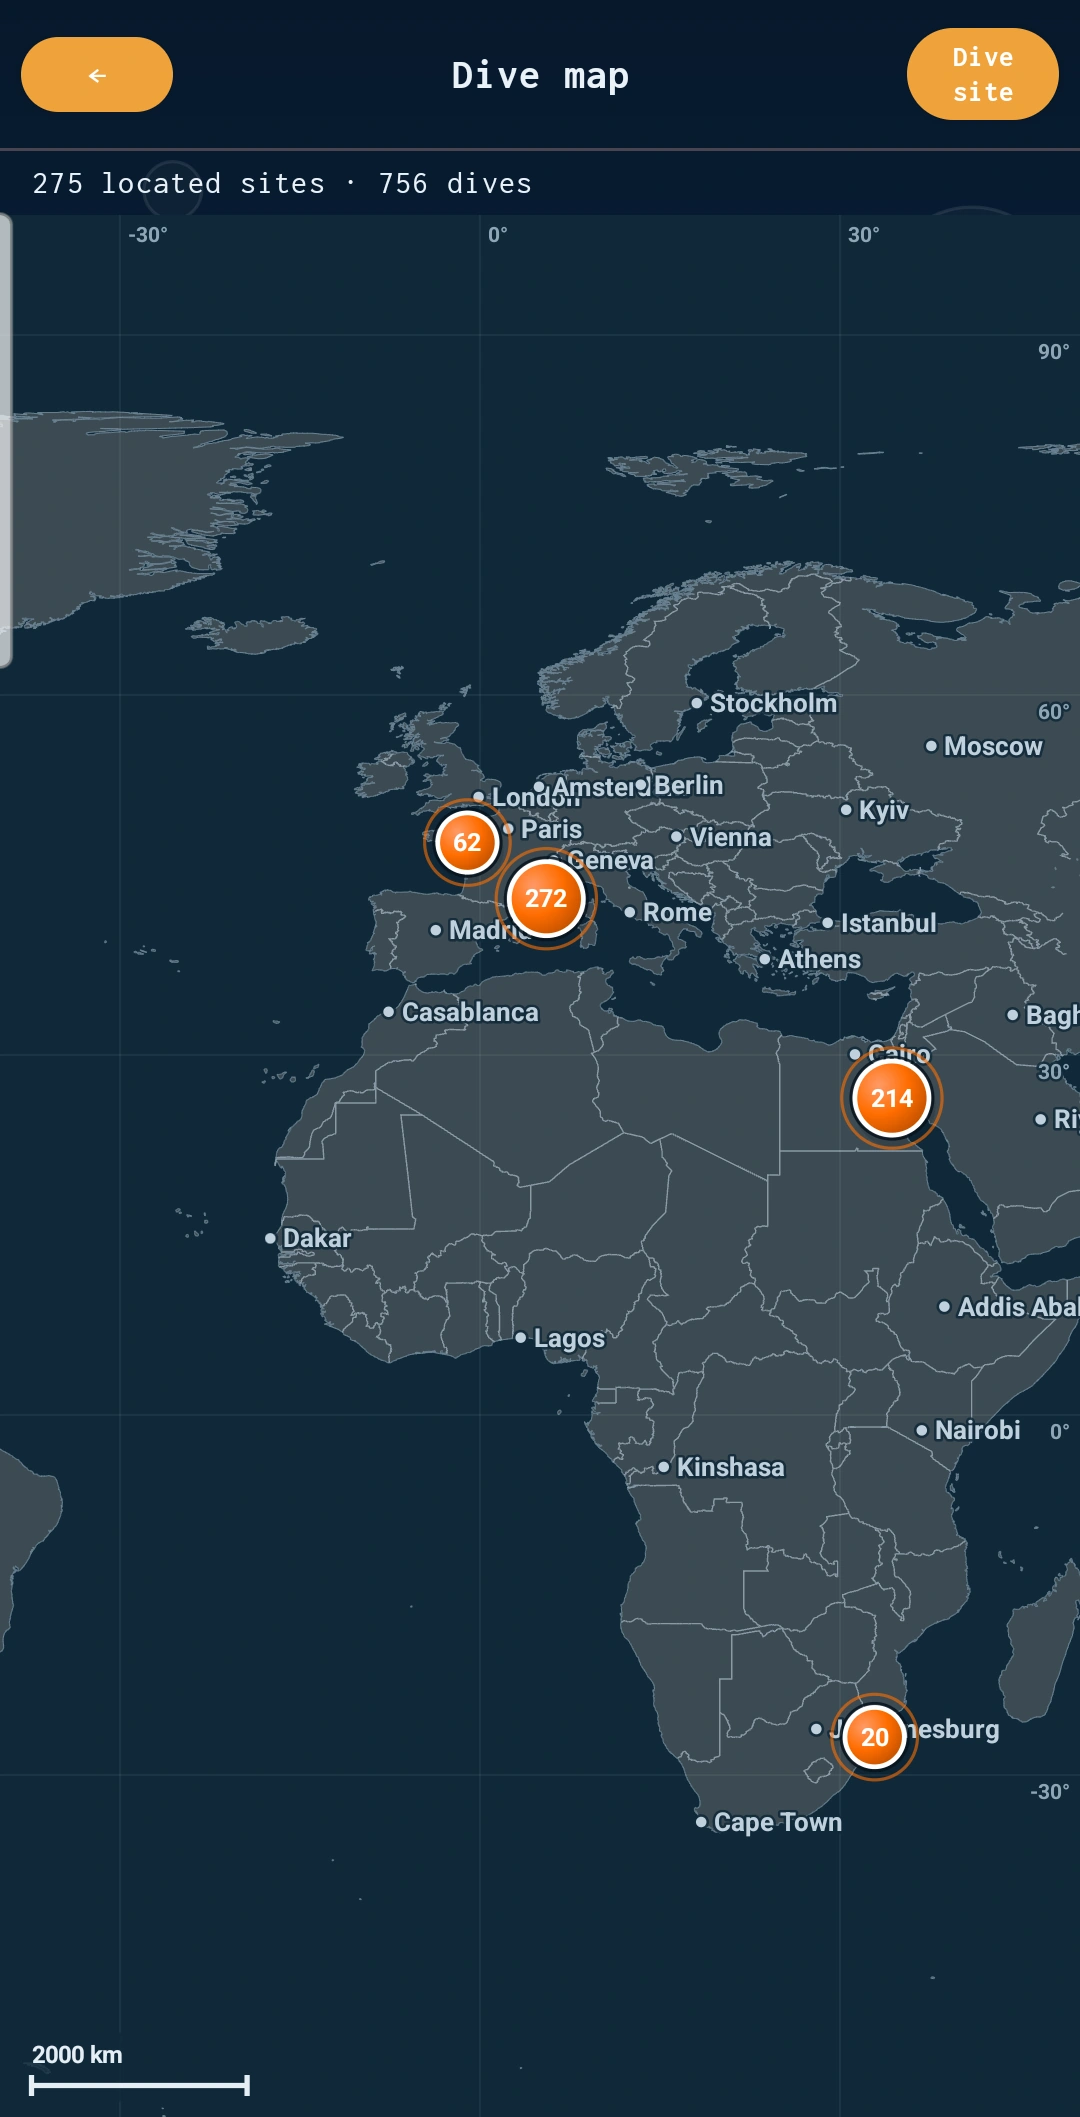
All your located sites, grouped by area; a site without coordinates is placed by hand, from the phone's position or with an OpenStreetMap search.
Plan-independent calculations to prepare your gases.
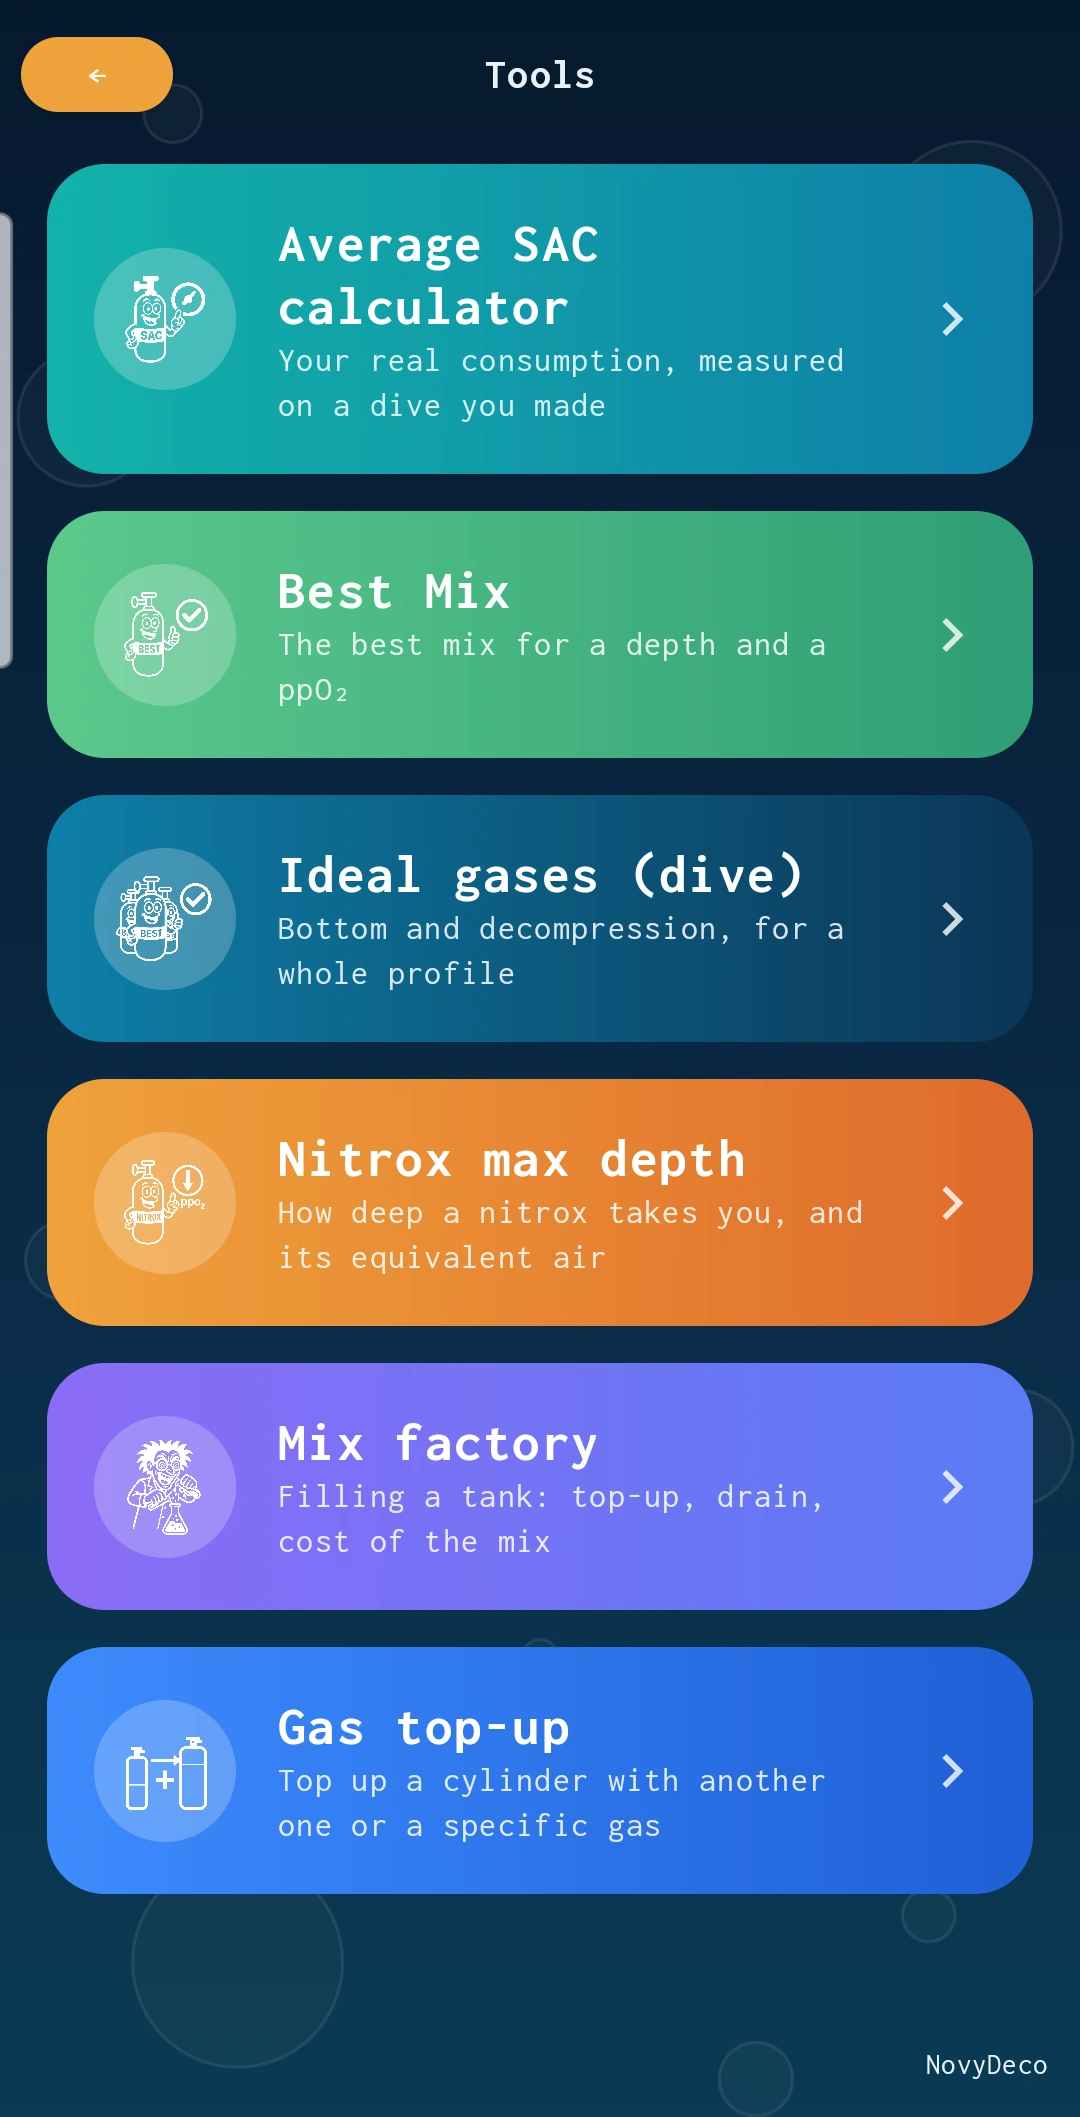
Real consumption (SAC) measured on a dive, best mix for a depth, ideal gases for a whole profile, maximum depth of a nitrox, the mix factory, and gas top-up: a cylinder topped up with another one or a specific gas, with the resulting mix at each step.
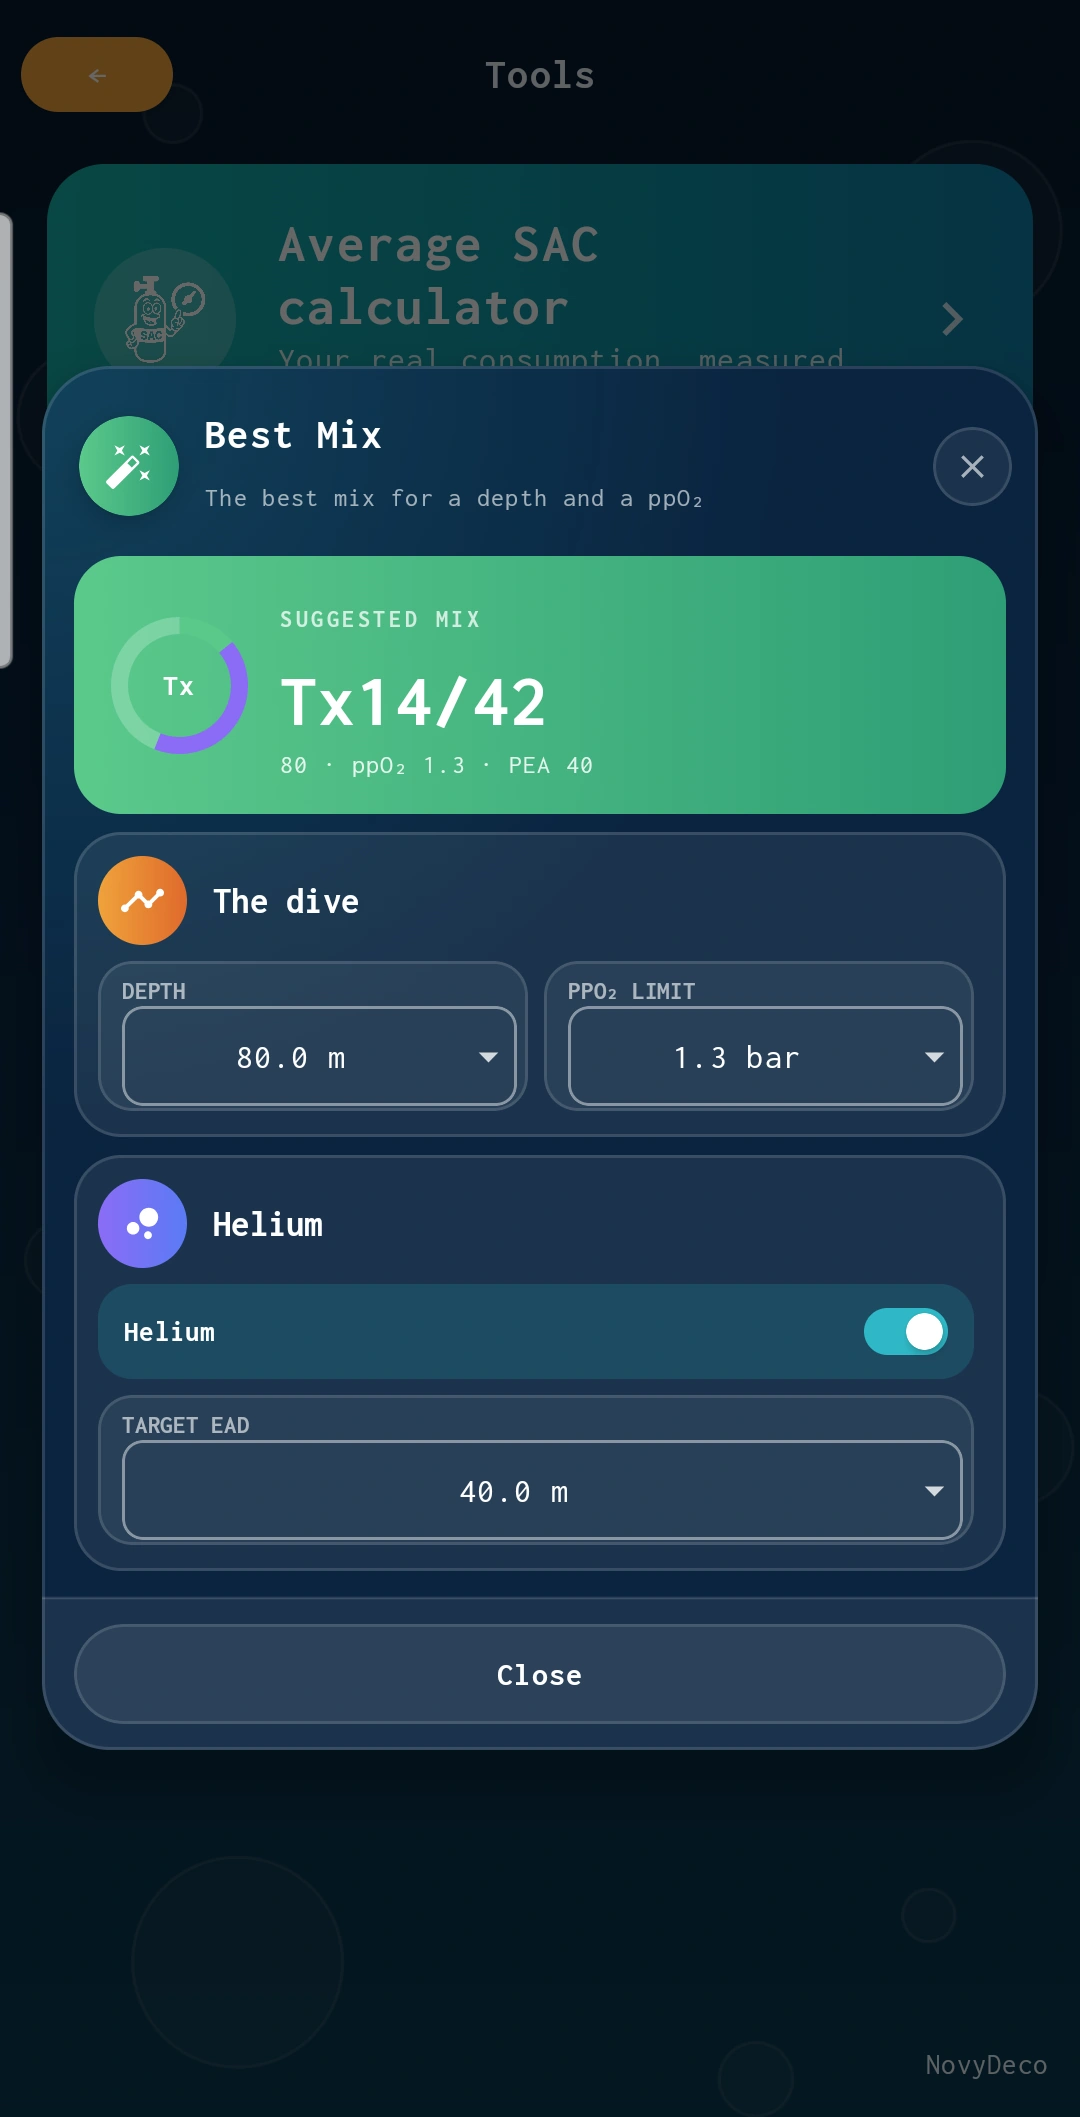
Give the depth and the ppO₂ limit, and, with helium, the END you want: NovyDeco suggests the mix.
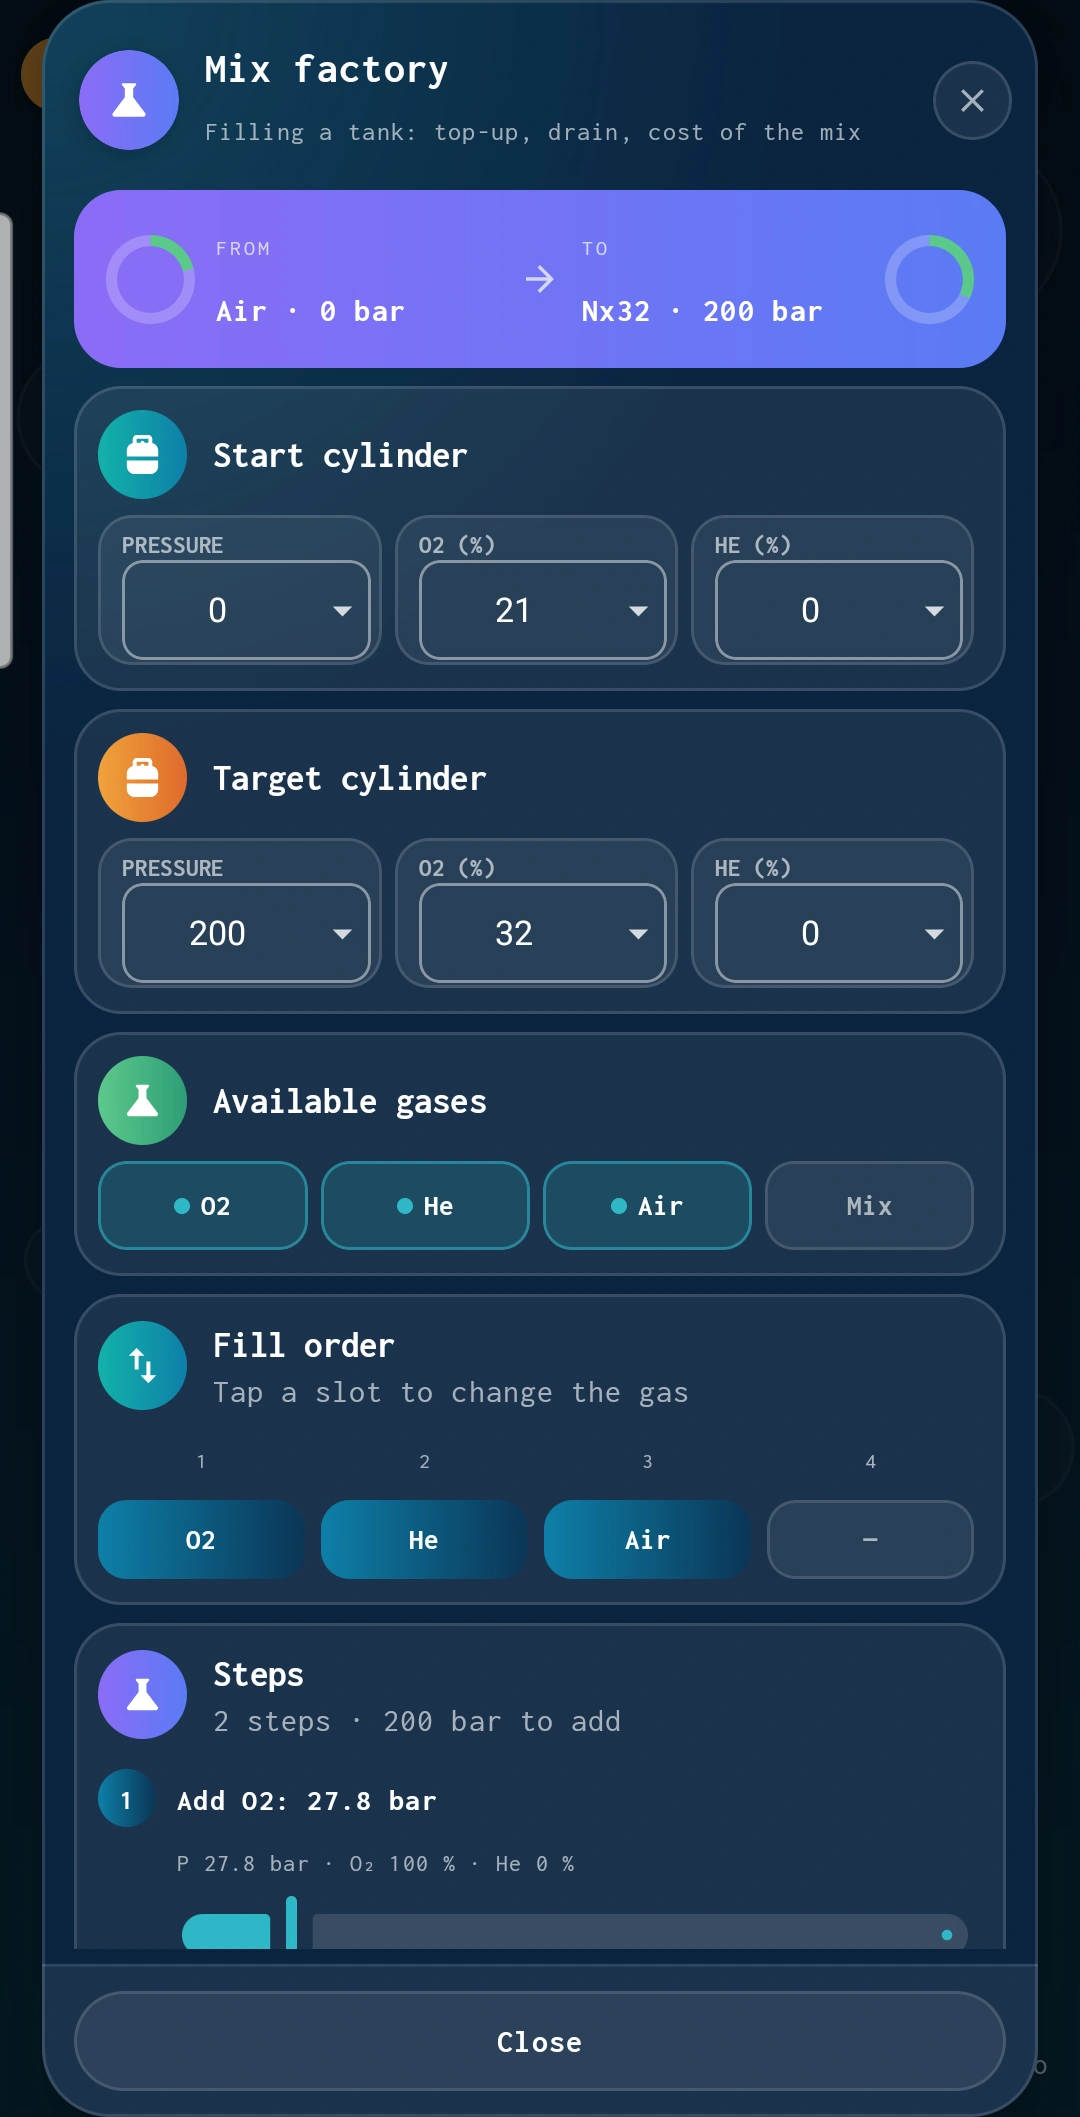
From what is in the cylinder to the mix you want: the filling steps, in the order of the available gases, and the price of the mix.
The gestures you cannot guess. This chapter will grow with each version.
Install NovyDeco and enjoy a 10-day trial with every feature.